Sunday, August 8, 2010

Marinated Flank Steak Fajitas

It may come as a shock to some, but we have never made fajitas before. Tacos and quesadillas are our "Mexican" stand-bys. So, when my wife said she bought some flank steak to do fajitas, I was very eager to give it a go.

Following our characteristic of planning meals late in the day, we took the flank steak out around noon to defrost. Around came 4pm and it still was an ice block; turn on the cold water to help this process move along. Ok, not the best method, but it does the trick when needed.

Ok, now we have the steak ready to be marinated and we had looked on-line to find a concoction. All Recipes came to the rescue:   http://allrecipes.com//Recipe/marinated-flank-steak/Detail.aspx


  • 1/2 cup vegetable oil
  • 1/3 cup soy sauce
  • 1/4 cup red wine vinegar
  • 2 tablespoons fresh lemon juice
  • 1 1/2 tablespoons Worcestershire sauce
  • 1 tablespoon Dijon mustard
  • 2 cloves garlic, minced
  • 1/2 teaspoon ground black pepper
  • 1 1/2 pounds flank steak

Surprisingly enough, we had all these ingredients in the house! I knew buying that red wine vinegar would come in handy! 

We combined everything and let it marinade for about 3.5 hours. It called for 6+, but as I mentioned, we were late planners. 

Grilled the steak for 7 minutes each side and let it sit for about 5 minutes before taking the electric knife to it - I think slightly less on the grill would be good, perhaps 5-6 minutes each side. In the mean time, we sauteed some green and red peppers and an onion, and got the sour cream, cheese and salsa ready. I tried to slice the meat very thin and as you can see by the photo, it was solid effort. (You'll also see how it could have used just a little less time on the grill).
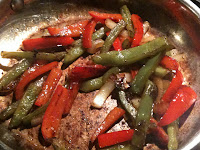
And here were the delicious vegetables to accompany the steak
So, our thoughts - well the meat was delicious. It had a nice crust to it from the grill and the inside was moist and tender. We started eating it as I was cutting - it had the potential of being eaten before we even got the chance to wrap everything up! It was very, very good. Great flavours from everything really - it was all so distinctive and yet came together as one. I highly recommend the marinade and we'll be doing it again in the near future - just that we'll plan better and let it sit for longer - help soak up more!

Wednesday, July 28, 2010

Pizza Time! Excellent!

As many of you will come to find out, I'm quite the fan of pizza. Seriously, when you think about it, what's not to like? Creativity and flavours shine when making your own pie - anything you want can go on it..brilliant!

As a result, one of my goals in life is to perfect the pizza crust. To me, the crust is as important as the quality of the ingredients on top. I've tried many different recipes and the one I'm playing around with the most lately, is one from the Panasonic bread maker that I inherited from my parents (they bought a new one). It's a very simple recipe that takes 45 minutes to knead together. (This makes two large pizzas).

I let the dough rest for about 10 minutes before having at it. It could be all in my head, but I think the rest makes it easier to shape. I then shape it and place it on my pizza pan. Now, I've tried the stones and I couldn't get a brown enough crust on them. I gave the pizza pan a go, and the holes in the bottom have helped me get a more brown bottom. I bought it from Crate and Barrel for about $15 I think. Best purchase ever!

Here are a couple of photos of the recent pie (olive oil and herb base, mozzarella (shredded and ball), goat cheese and tomatoes):
 

I have become rather consistent in replicating the dough and the results. I do pre-bake the dough before adding ingredients. This allows me to get a crispier crust by the time all the cheese melts and starts to brown. I pre-bake at 450* for 8 minutes and then add the toppings before baking for a further 10-12 minutes.

Everything turns out great, except that I find the crust to be a little chewy sometimes and not crispy enough. Although it looks crispy, there is a bit of a chew to it. I'm trying to figure out what to change, but I don't quite have an idea yet. Any thoughts out there??

Tuesday, July 27, 2010

Ohio Brew Week's Beer Competition

This past month saw our first entrance in a homebrew competition - Ohio Brew Week - down in Athens, Ohio.We entered three of our beers - the two Golden Amber Wheats and the latest Limon Punch. We had unrealistic high hopes and deep down never expected to place; we were more interested in getting an unbiased review of our brews.

Well, we didn't place in the Top 3 of our categories, but we didn't fair too badly either:  both Golden Amber Wheats received a "Very Good" distincting and the Limon Punch a "Good". The scale was Outstanding, Excellent, Very Good, Good, Fair, and Problematic. So, technically, we should be rather proud of our accomplishments. But, when I read into the grading it said that the beer was also graded against the style of beer in which it was entered in - some of our comments suggested that we entered it into a 'wrong' style category. So, perhaps the score would have been higher? I'd like to think so!

Regardless, a great first start to perfecting our beers. A common critique was to focus on balancing the beer - balancing the hops and malt. When I think about it, it makes sense that each of the beers had that suggestion - since we used the same amount of malt (exception of the Limon Punch) and used the same proportion of hops at each introduction to the wort (45 min, 15 min, 10 min). So, we need to understand how to better balance our recipe and give it another shot. Unfortunately, it won't be for another month or so as schedules are hectic for the summer!

Here are the score sheets from the competition (good luck reading the handwritting!):

Beer #1:


Beer #2:

Beer #3

Apologies for the watermark, but I had these in a PDF format and had to convert to a JPG to upload - the only free software I found put a watermark on each image.